

Check your files carefully before you upload them. Today, you can’t correct or delete data once it’s imported.
The steps
- Create the administration.
- Define the financial years and periods.
- Upload the starting balances.
- Upload the transactions.
Step 1: Create the administration
- Click Settings in the main rail, and choose Excel imports.
- Click Add new administration.
- Basic information: fill in the Name, the VAT Number and the Legal type. Click Next.
- About the company: search and select the Economic activity, and choose the Company type. See Sectors and company types. Click Next.
- Address: fill in the address of the company. Click Next.
- Is this correct?: check the details, and click Submit.
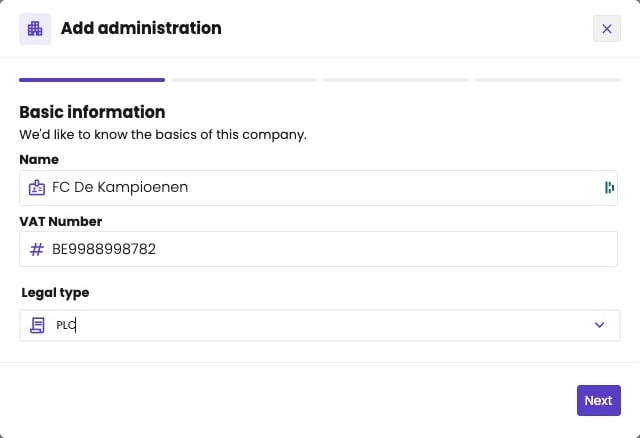
Step 1 of 4: the name, VAT number and legal type.
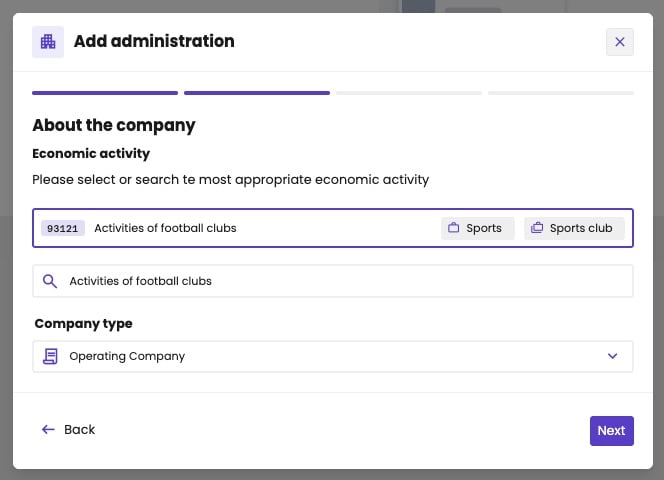
Step 2 of 4: the economic activity and company type.
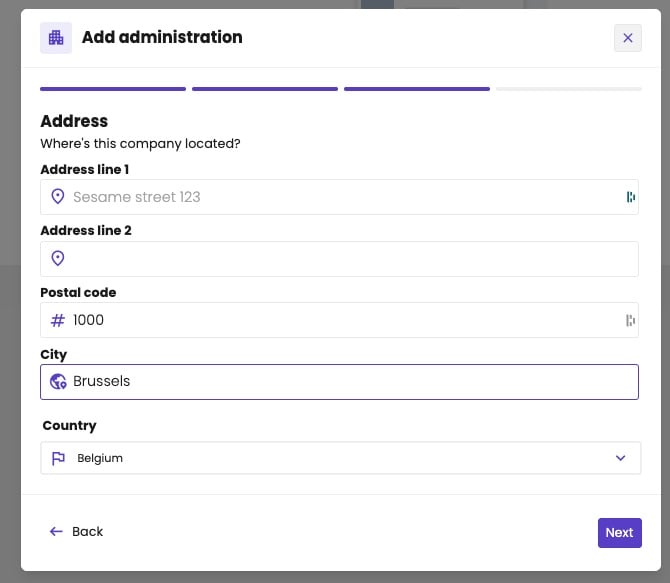
Step 3 of 4: the address.
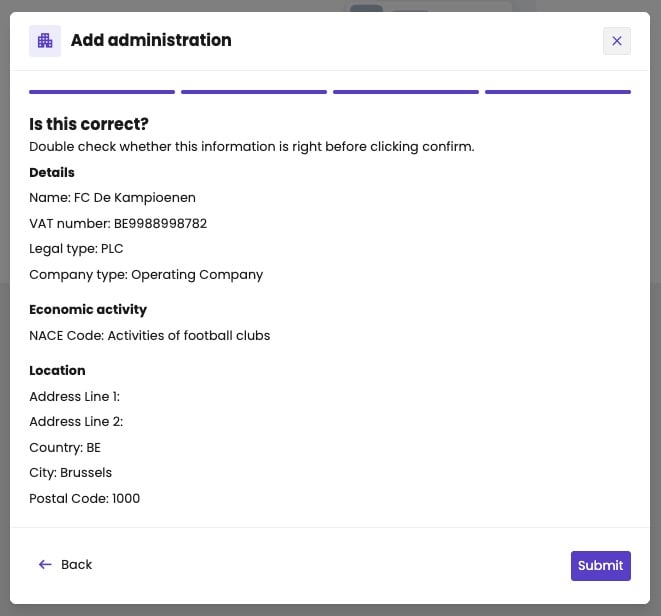
Step 4 of 4: check and submit.
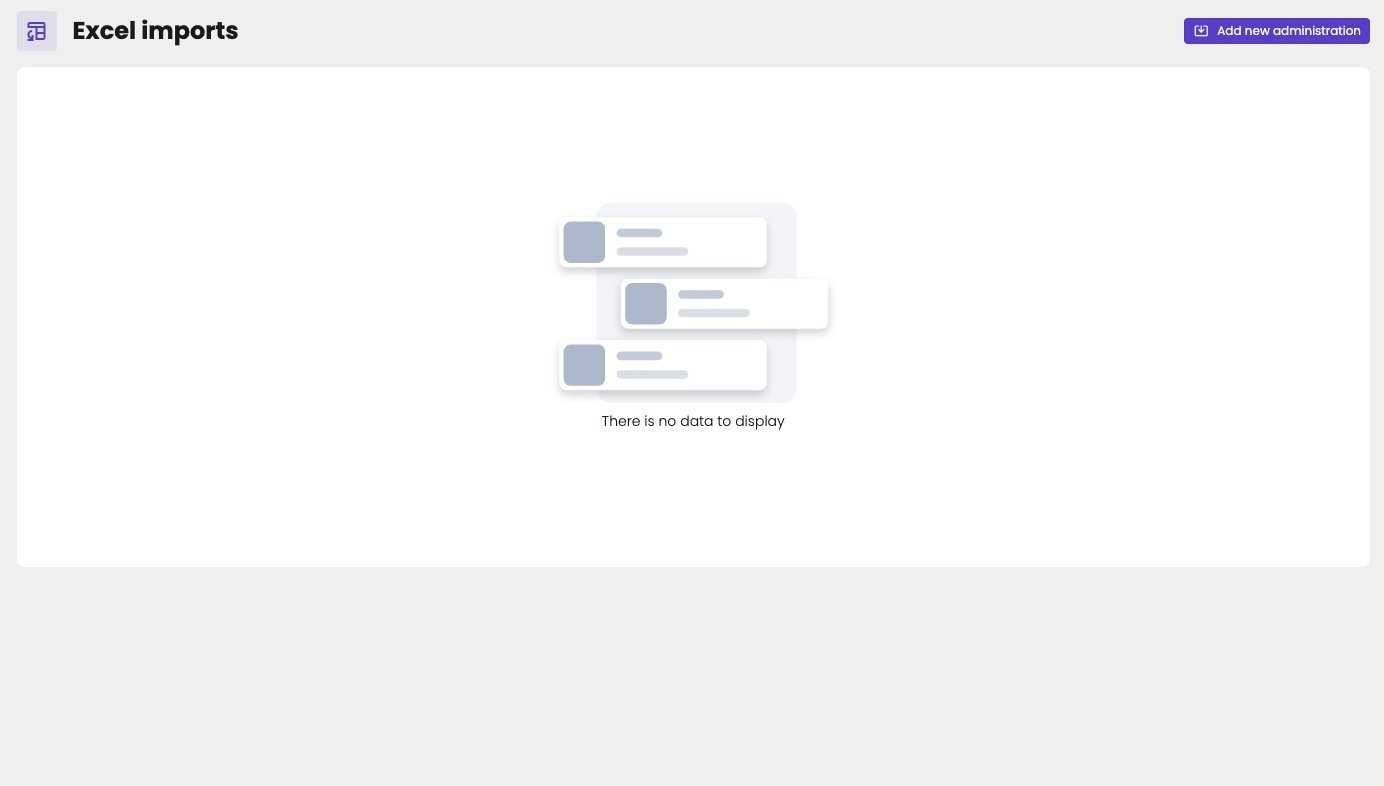
The administrations imported from Excel.
Step 2: Define the financial years
Open the administration. It doesn’t have any figures yet: you land on Import data, which shows what still needs to be done.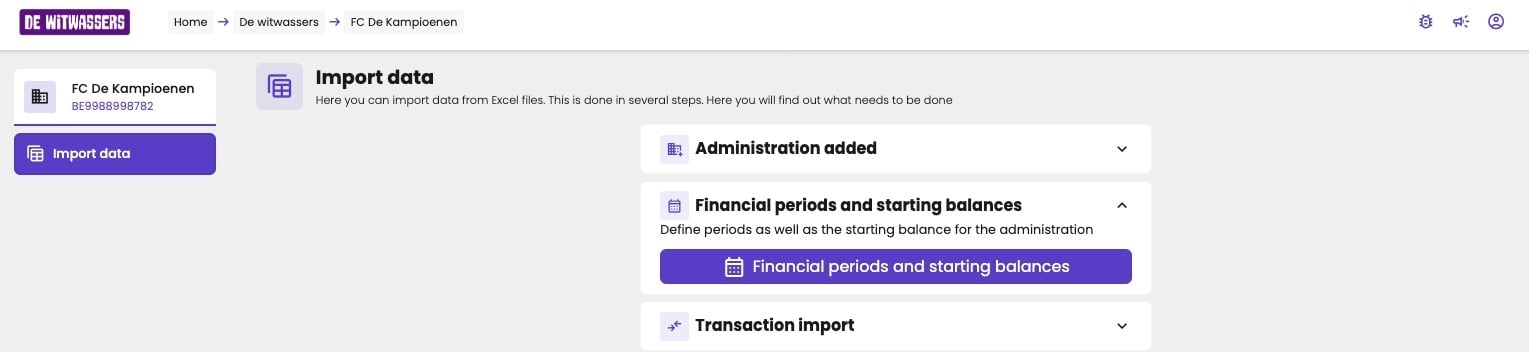
Import data: the steps to fill the administration.
- Click Financial periods and starting balances.
- Click Add period for each financial year you’ll upload.
- For each financial year, fill in:
- Period ID: the ID of the financial year. aiGust proposes the year, such as 2025. Use the ID your bookkeeping uses for that financial year, because your transactions will refer to it.
- Period start date and Period end date.
- Booking periods: how the financial year is split into periods: months, quarters or the whole year.
- Click Next.
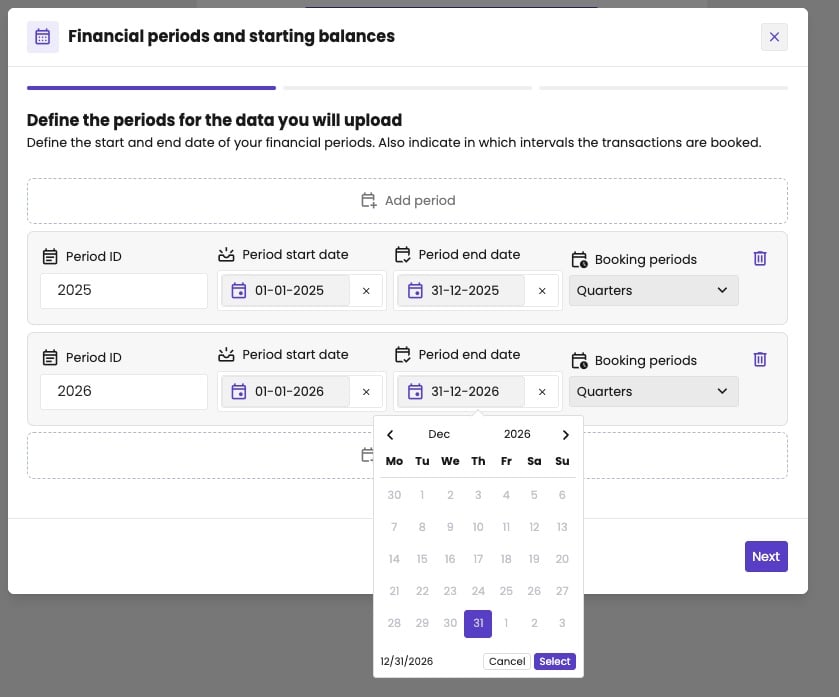
Two financial years, each split into quarters.
Step 3: Upload the starting balances
aiGust needs the balance of each GL account at the start of the first financial year you upload. These are mainly the balance sheet accounts: at the start of a financial year, the P&L accounts are zero. For example: if you start with financial year 2023, give the balances on the first day of financial year 2023.-
Click Download beginning balances template file, and fill it in. The file needs these columns:
- Drag the file to the dialog, or click Select a file to upload. Upload a clean file, with only these columns and your data.
-
Link the columns, and choose the formats:
- Under Required columns, every column needs a column of your file.
- Under Optional columns, you can leave a column on None.
- Choose the Date format your file uses, such as
dd/MM/yyyyoryyyy-MM-dd. - Choose the Value format:
1.234,56, with a decimal comma, or1,234.56, with a decimal point.
- Click Next.
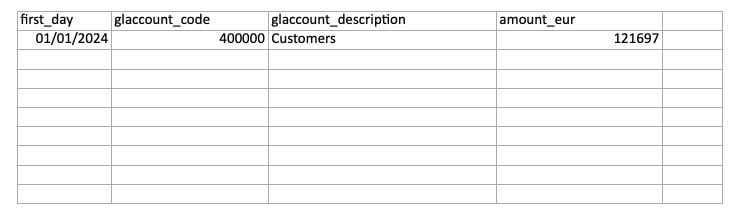
The template for the starting balances.
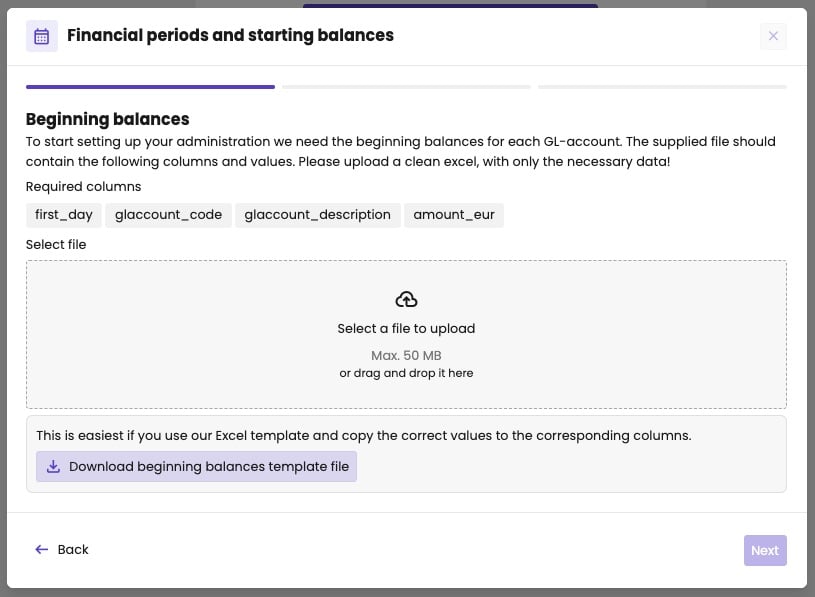
Upload the starting balances.
Step 4: Upload the transactions
The last step of the wizard is the transactions. Upload all transactions of the financial years you defined. Download the template to see the format. You can give the amount in one column, or split it into debit and credit:
As with the starting balances, link the columns to your file, and choose the Date format and Value format. Every date must match the date format. An amount aiGust can’t read is imported as 0, so check your amounts before you upload.
aiGust places each transaction in the right financial year and period by its date.
aiGust then prepares the data and calculates everything. Come back after 10 to 15 minutes: the figures are there.
Add data later
To add a new financial year later:- Define the new financial year, as in step 2.
- Upload its transactions, as in step 4. You don’t need starting balances again.