You connect Yuki with an API key that you create in Yuki. Many firms have more than one Yuki portal, for example one for the clients who do their own bookkeeping and one for the others. Each portal needs its own API key, and its own connector in aiGust.

Step 1: Create an API key in Yuki

  1. Sign in to Yuki.
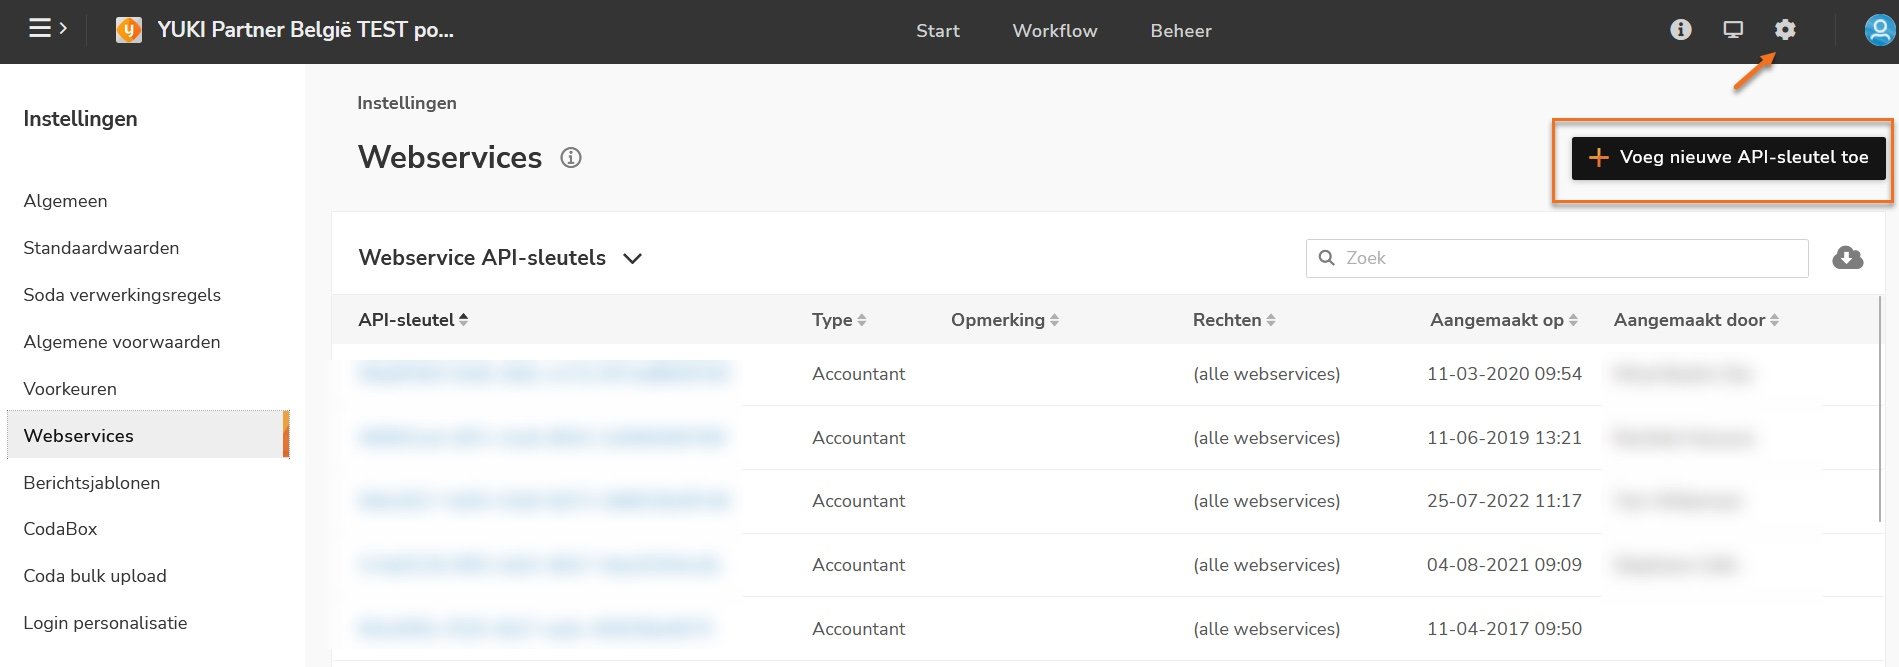
  2. Click the gear icon at the top right to open the settings (Instellingen), and choose Webservices.
  3. Click Voeg nieuwe API-sleutel toe (Add new API key), and create an API key for aiGust.
  4. Copy the API key.
Yuki explains it in Webservices in portaal instellen.
Yuki settings page Instellingen with Webservices selected in the menu on the left, and an arrow to the gear icon at the top right. The page lists the Webservice API-sleutels with their type Accountant, rights (alle webservices) and creation date, the keys and creators blurred. The button Voeg nieuwe API-sleutel toe is marked in orange.

Webservices in the settings of Yuki.

Step 2: Add the connector in aiGust

  1. Click Settings in the main rail, choose Connectors, and click Add.
  2. Choose Yuki, and click Next.
  3. Give the connector a Name. With several portals, use the name of the portal, so you can tell the connectors apart.
  4. Paste the API key, and click Create connector.
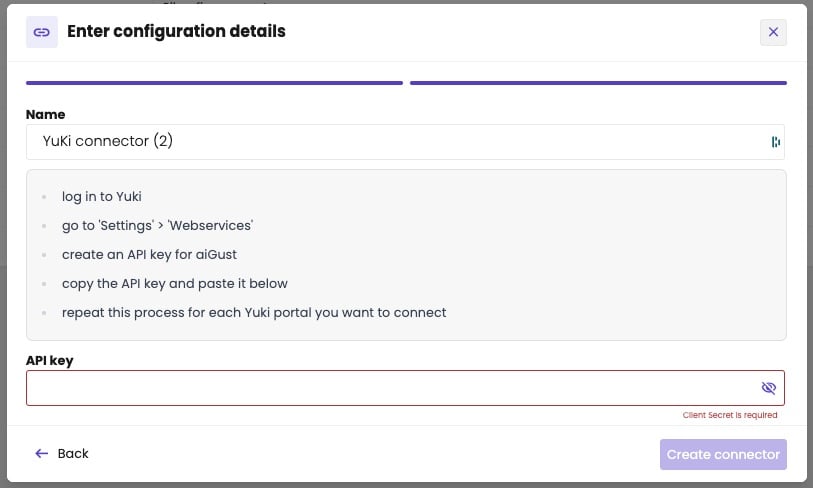
Enter configuration details dialog for a Yuki connector, with the Name YuKi connector (2) and the instructions: log in to Yuki, go to Settings > Webservices, create an API key for aiGust, copy the API key and paste it below, and repeat this process for each Yuki portal you want to connect. Below, the API key field. Buttons Back and Create connector.

Paste the API key of your Yuki portal.

Repeat both steps for each Yuki portal. The first administrations and figures appear in aiGust about 24 hours later. See How administrations are imported.