

Step 1: Register aiGust in Microsoft Entra
- Sign in to the Azure portal, and open Microsoft Entra ID.
- On Overview, copy the Tenant ID.
- Go to App registrations, and click New registration. Give it a name, for example aiGust, and register it.
- On the page of the new app, copy the Application (client) ID.
- Under Certificates & secrets, create a new client secret, and copy its value right away. Microsoft only shows it once.
- Under API permissions, add a permission: Dynamics 365 Business Central › Application permissions › API.ReadWrite.All. Then click Grant admin consent.
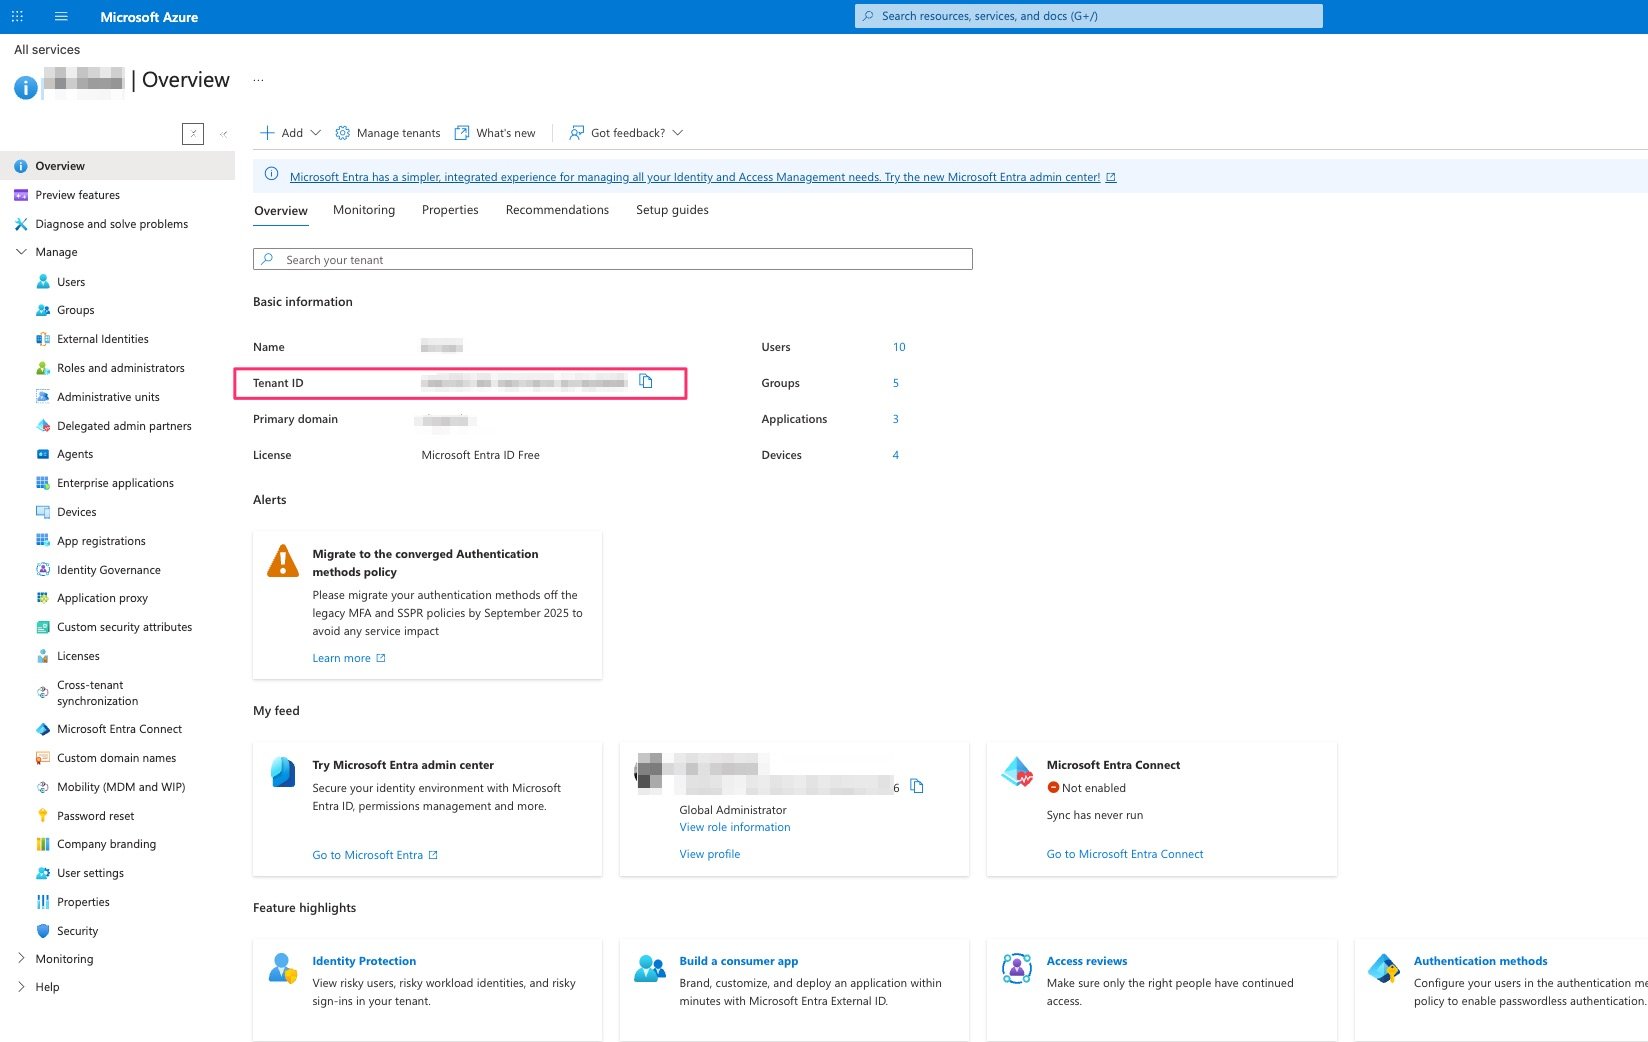
The Tenant ID on the overview of Microsoft Entra ID.
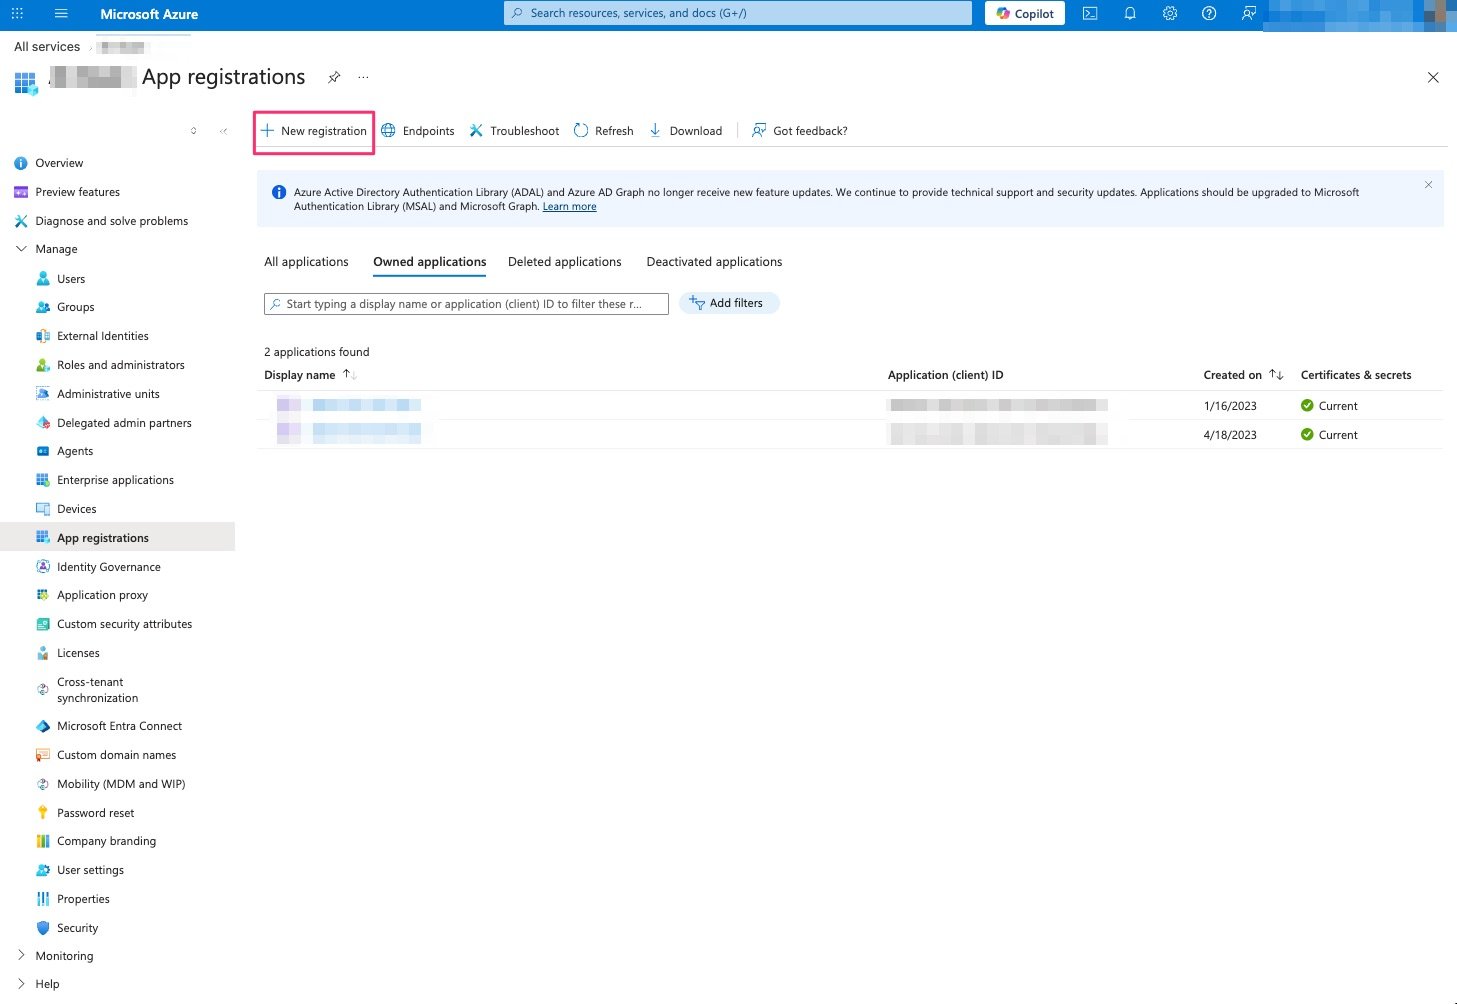
Register a new app.
Step 2: Give the app access in Business Central
Do this in each Business Central environment you want to connect:- Open the Microsoft Entra Applications page.
- Add the Client ID of the app, set its State to Enabled, and grant consent.
- Assign a permission set:
- D365 READ: read access to everything. The simplest option, and the one we recommend.
- Or a read-only permission set of your own, if you want to give as little access as possible. It needs read access to Company Information, Customer, Vendor, G/L Account, Accounting Period and G/L Entry, and to Cust. Ledger Entry, Vendor Ledger Entry and their detailed entries. Without those, the sync fails.
- Leave the Company field of the permission set empty, so it applies to all companies. aiGust syncs every company in the environment, and a company without permissions gives an error.
Step 3: Add the connector in aiGust
- Click Settings in the main rail, choose Connectors, and click Add.
- Choose Microsoft Dynamics 365 Business Central, and click Next.
- Give the connector a Name, and fill in the fields below.
- Click Create connector.
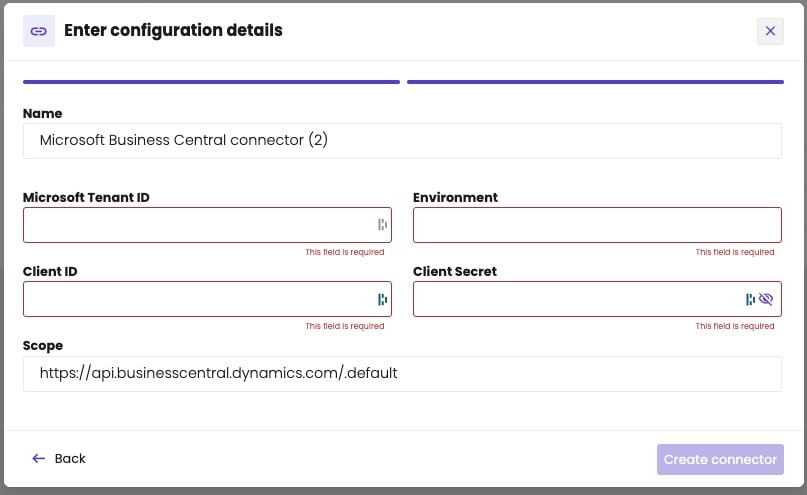
The details of your Business Central.