Everyone at your firm who works in aiGust needs a user. Only key users can add and manage users. Click Access in the main rail, and choose Internal users. Does your firm use AdminPulse? Then you can also sync your users from there. See AdminPulse. This page is about the users at your firm. For the people at your clients, see Invite and manage client users.

Add a user

  1. Click Access in the main rail, and choose Internal users.
  2. Click Add.
  3. User details: fill in the fields below, and click Next.
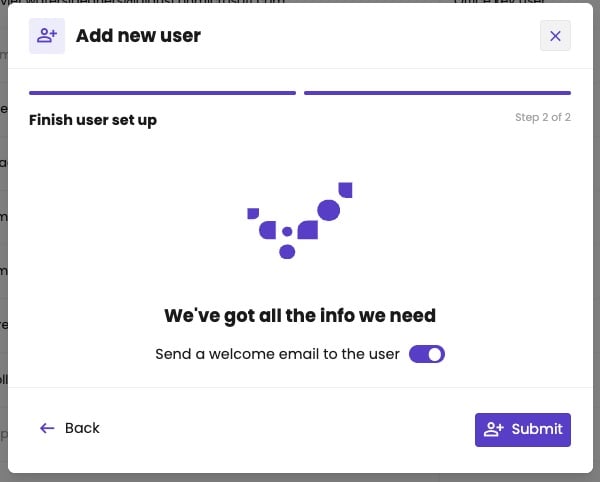
  4. Finish user set up: choose whether to Send a welcome email to the user, and click Submit.
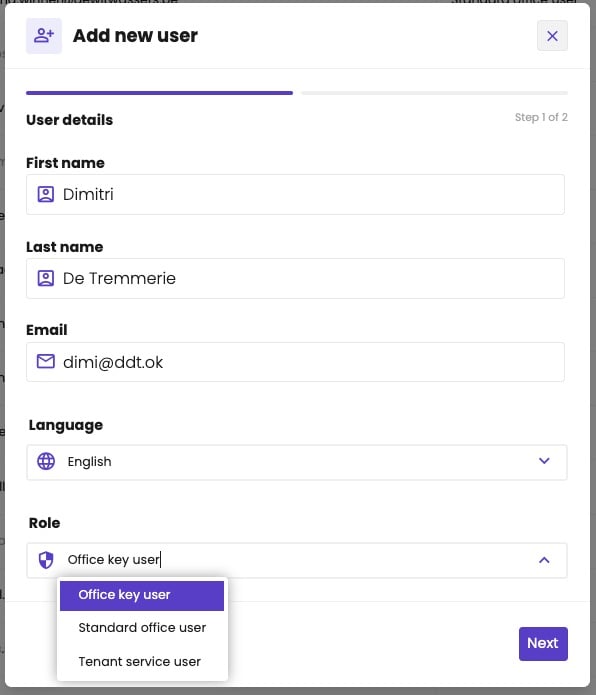
Add new user dialog, step 1 of 2, User details, with First name Dimitri, Last name De Tremmerie, Email dimi@ddt.ok and Language English. The Role list is open, with Office key user, Standard office user and Tenant service user. A Next button.

Step 1: the details of the user.

Add new user dialog, step 2 of 2, Finish user set up: We've got all the info we need, with the switch Send a welcome email to the user turned on. Buttons Back and Submit.

Step 2: send the welcome email, or not.

The new user has access to all administrations of your firm. To limit that, open the user after you added them. See Restrict administration access.

The welcome email

Send a welcome email to the user is turned on by default. The email lets your colleague sign in with Google or Microsoft, or set a password. See Sign in to aiGust. Before you add your colleagues, check the text of the Welcome email in your email templates. That’s what they’ll read first. If you don’t send it, tell your colleague yourself how to sign in. You can send it later with Resend welcome email.

Add users in bulk

To add many users at once, upload them from a CSV or Excel file.
  1. Click Access in the main rail, and choose Internal users.
  2. Click Add in bulk.
  3. Click Download template to get an Excel file with the right columns. Fill in one row per user.
  4. Drag your file to the dialog, or click Select a file to upload. The file can be up to 50 MB. Click Next.
  5. Outcome of the bulk job shows how many users aiGust added. Click the download icon to get an Excel file with who was added and who wasn’t. Then click Submit.
The file needs these columns: Without send_welcome_email, or when it’s empty, the user doesn’t get a welcome email. Send it later with Resend welcome email. The dialog also lists tenant:service_user as a role. Don’t use it.
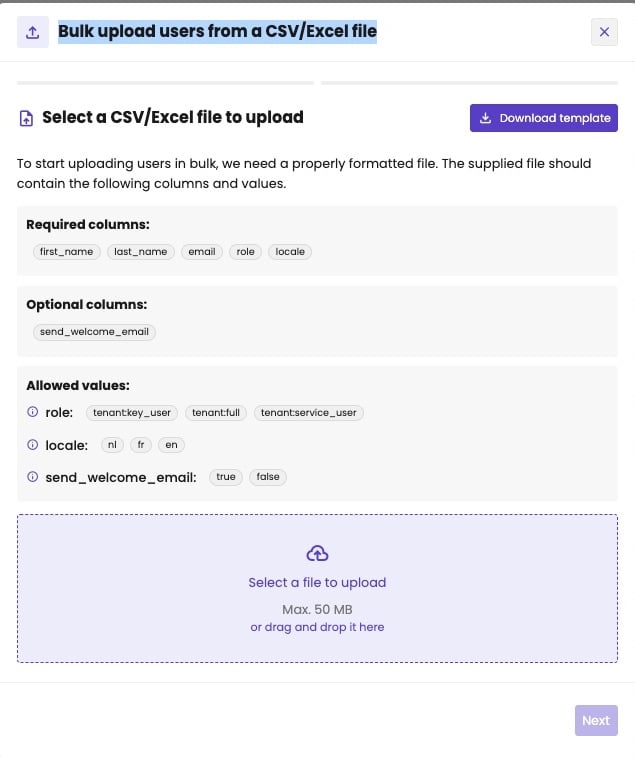
Bulk upload users from a CSV/Excel file dialog, step Select a CSV/Excel file to upload, with a Download template button. Required columns: first_name, last_name, email, role and locale. Optional columns: send_welcome_email. Allowed values: role tenant:key_user, tenant:full and tenant:service_user; locale nl, fr and en; send_welcome_email true and false. Below, a drop zone Select a file to upload, Max. 50 MB, or drag and drop it here, and a Next button.

Step 1: the columns and values the file needs.
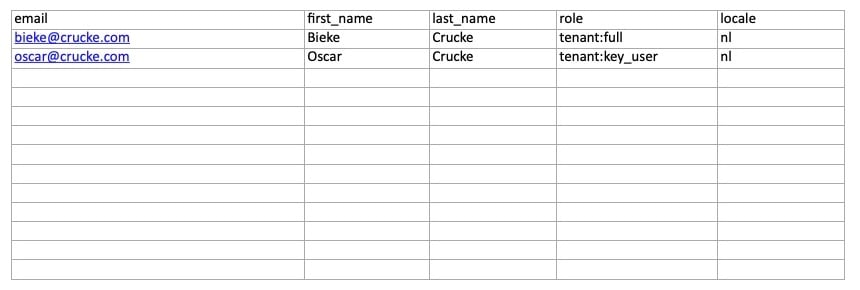
Spreadsheet with the columns email, first_name, last_name, role and locale. Two rows: bieke@crucke.com, Bieke, Crucke, tenant:full, nl, and oscar@crucke.com, Oscar, Crucke, tenant:key_user, nl.

The template, filled in with two users.
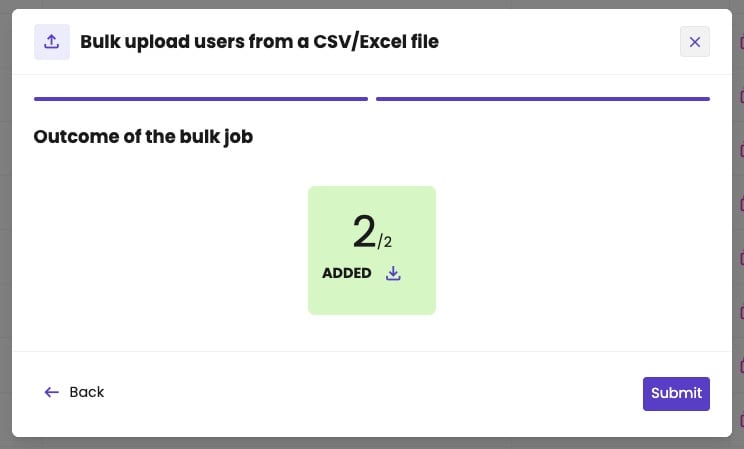
Bulk upload users from a CSV/Excel file dialog, step Outcome of the bulk job, with a green box 2/2 ADDED and a download icon. Buttons Back and Submit.

Step 2: the outcome of the upload.

You can’t restrict administration access in the file. All users you upload have access to all administrations. To restrict it, open each user afterwards. See Restrict administration access.

Manage users

Access › Internal users lists all users at your firm, with their email address, role, administration access, and whether they’re active. Deactivated users are greyed out. Search the list, or filter it by Status, Bèta testers or User Role. Click Export to download it.
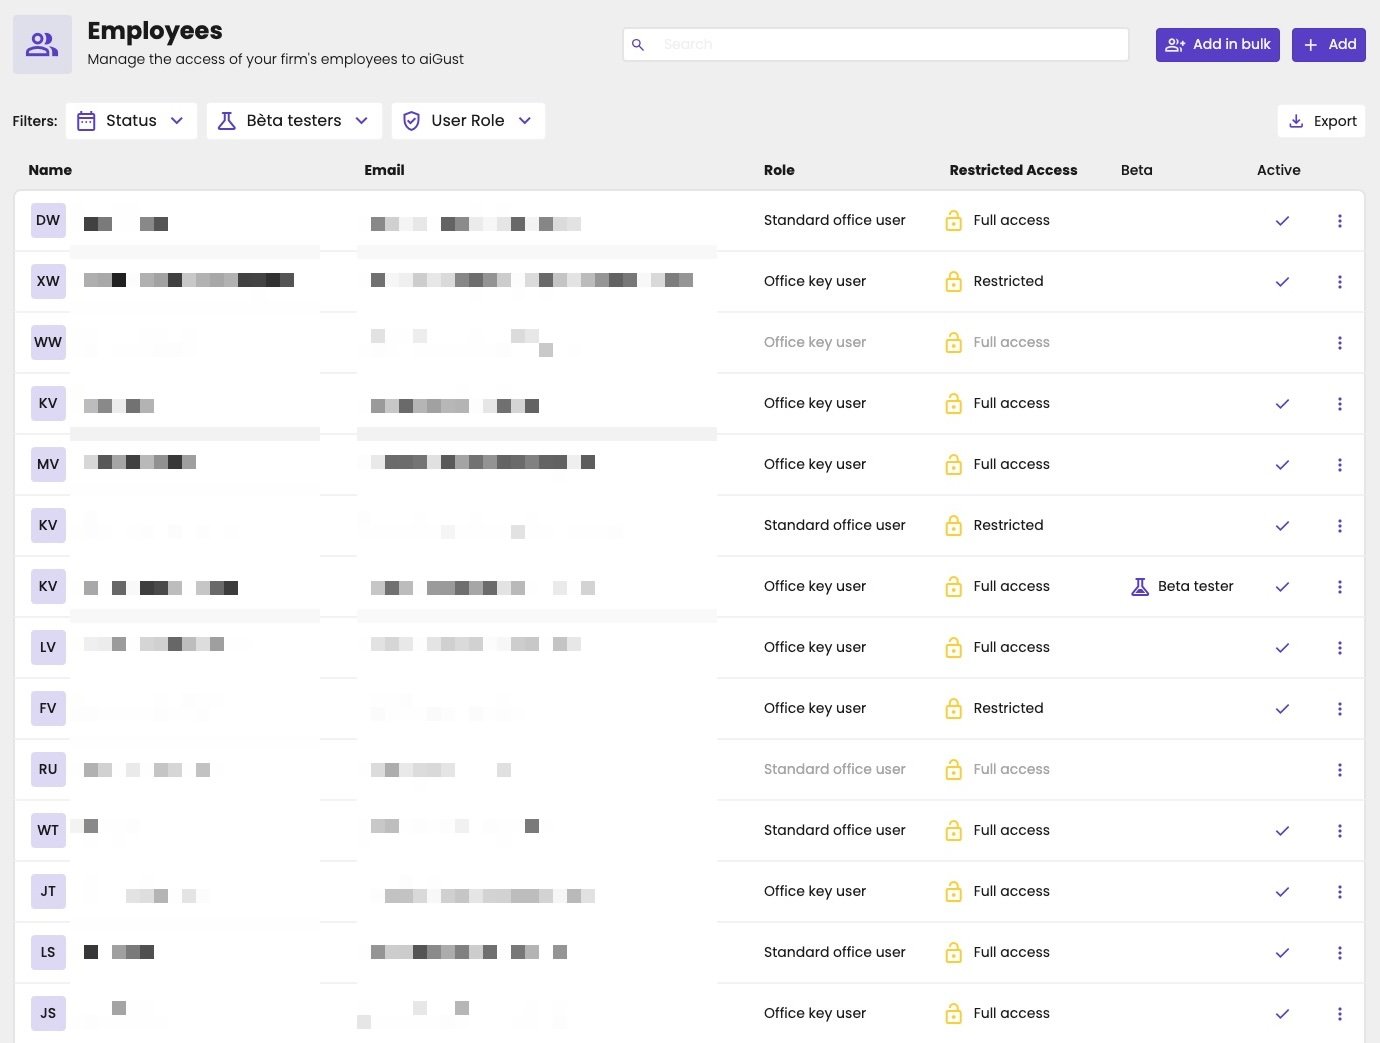
Employees page, with Search, Add in bulk and Add, the filters Status, Bèta testers and User Role, and Export. The list shows users with their initials, a blurred name and email address, their role, Standard office user or Office key user, and their Restricted Access, Restricted or Full access. One user is marked Beta tester in the Beta column. Most have a check mark under Active. Two users without one are greyed out.

All users at your firm.

The Restricted Access column shows Restricted for users who only see part of the administrations, and Full access for users who see all of them. The Beta column shows who’s a beta tester: they get new features before everyone else. The aiGust team chooses the beta testers. Click the three dots next to a user:
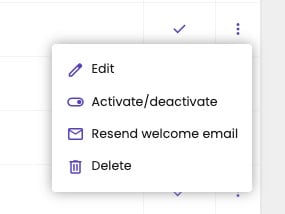
Three-dots menu of a user with Edit, Activate/deactivate, Resend welcome email and Delete.

The options of a user.

When a colleague leaves your firm, deactivate their user. They can then no longer sign in, also not with Google or Microsoft.

Delete a user

Deactivating is reversible: you can activate the user again later. Deleting is not.
  1. Click the three dots next to the user, and choose Delete.
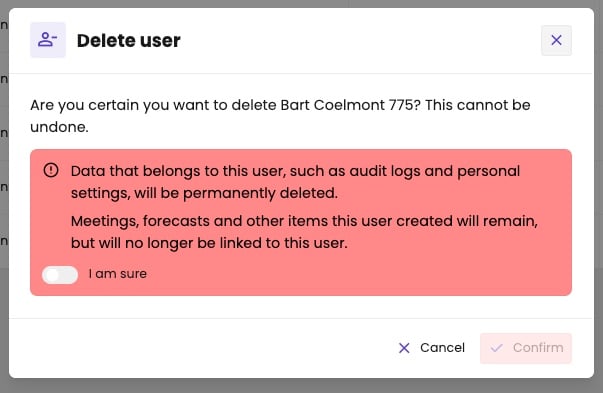
  2. Read the warning. It explains what happens:
    • Data that belongs to the user, such as their audit logs and personal settings, is deleted for good.
    • Meetings, forecasts and other items the user created stay, but are no longer linked to the user.
  3. Turn on I am sure, and click Confirm.
Deleting a user also deletes their entries in the audit trail. If you need to keep track of what a former colleague did, deactivate their user instead.
Delete user dialog asking whether you're certain you want to delete the user, as this cannot be undone. A red banner says that data belonging to the user, such as audit logs and personal settings, will be permanently deleted, and that meetings, forecasts and other items the user created will remain but no longer be linked to the user. Below it, the I am sure toggle, turned off, and the buttons Cancel and Confirm, greyed out.

Turn on I am sure to confirm the delete.

Profile

The Profile tab holds the Personal details and Role of the user. Change what you need, and click Save.
  • Personal details: First name, Last name, Email and Language.
  • Role: the User Role. See Roles and permissions.
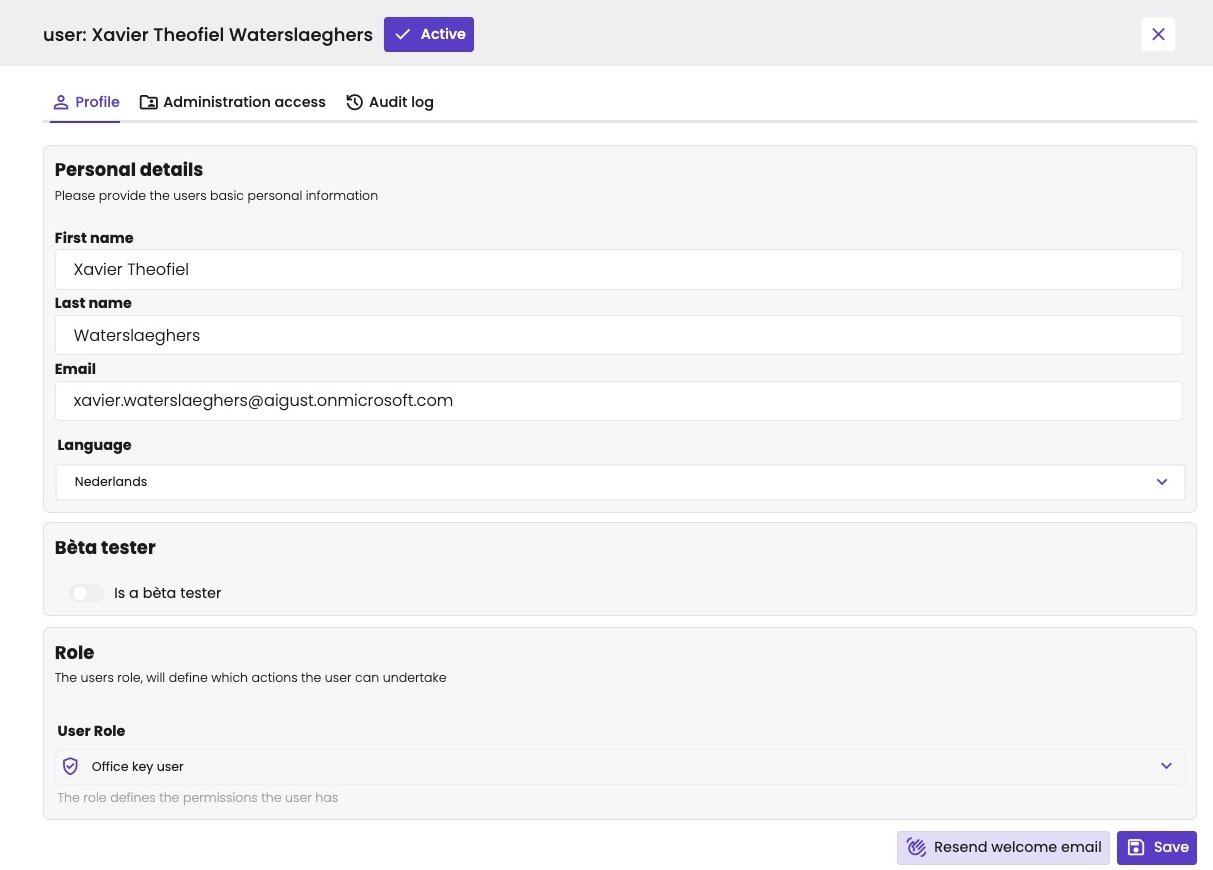
User panel for Xavier Theofiel Waterslaeghers, marked Active, on the Profile tab, next to the Administration access and Audit log tabs. Personal details with First name, Last name, Email and Language Nederlands, and Role with User Role Office key user. Buttons Resend welcome email and Save.

The profile of a user.

Administration access

The Administration access tab sets which administrations the user can see. See Restrict administration access.

Audit log

The Audit log tab shows what the user did, per day and per administration. Choose the period at the top right. For the actions of all users together, see Audit trail.